How to create a Windows service in C#?
Let's create a Windows Service in C# using Visual Studio.
Step 1
Open Visual Studio, go to File > New and select Project. Now select a new project from the Dialog box and select “Window Service” and click on the OK button.

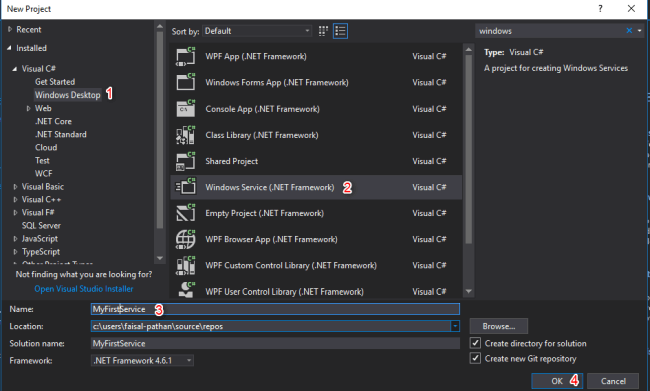
Step 2 Go to Visual C# -> ”Windows Desktop” -> ”Windows Service” and give an appropriate name and then click OK
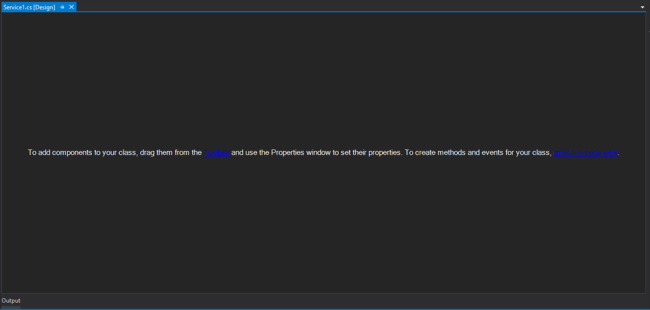
Once you click the OK button the below screen will appear, which is your service
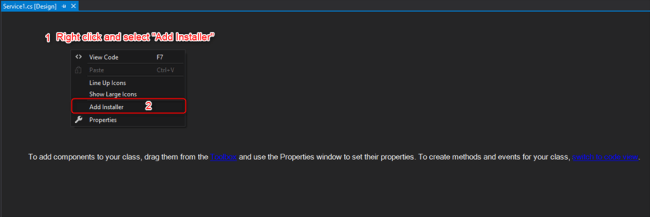
How to Add an Installer to a Windows Service
Before you can run a Windows Service, you need to install the Installer, which registers it with the Service Control Manager.
After Adding Installer, ProjectInstaller will add in your project and ProjectInstakker.cs file will be open. Don’t forget to save everything (by pressing ctrl + shift + s key)
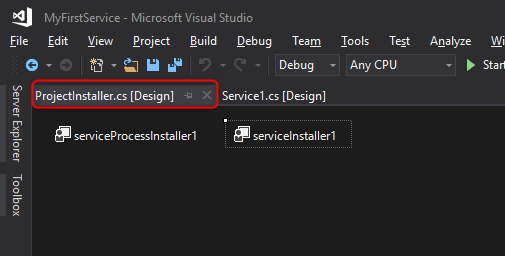
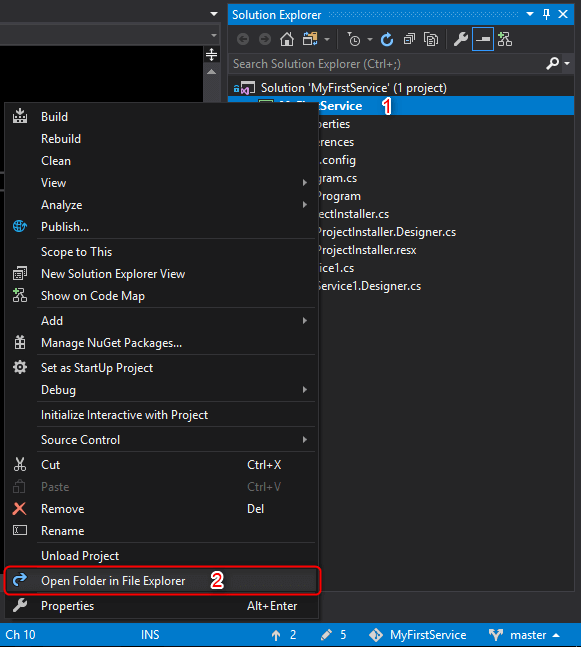
Solution Explore looks like this: 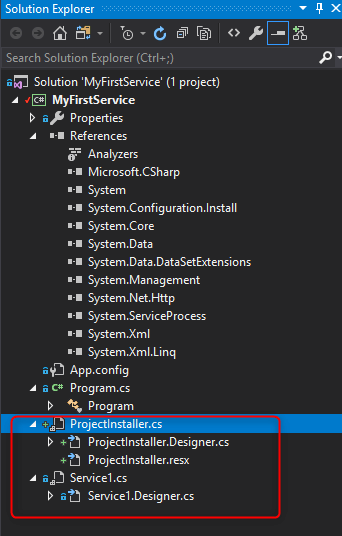
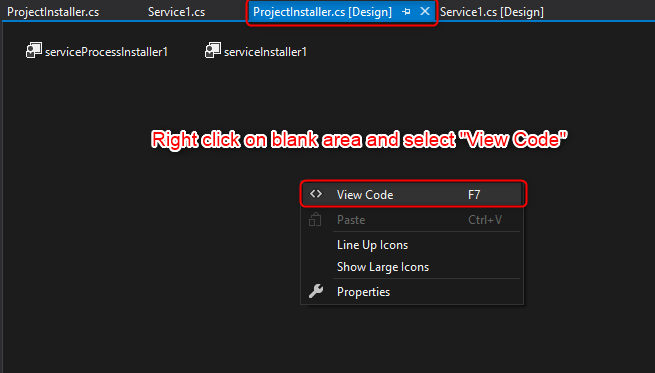
Step 4 Right-click on the blank area and select “View Code”
Step 5
The InitializeComponent method contains the logic which creates and initializes the user interface objects dragged on the forming surface and provided the Property Grid of Form Designer.
Very important: Don't ever try to call any method before the call of InitializeComponent method.
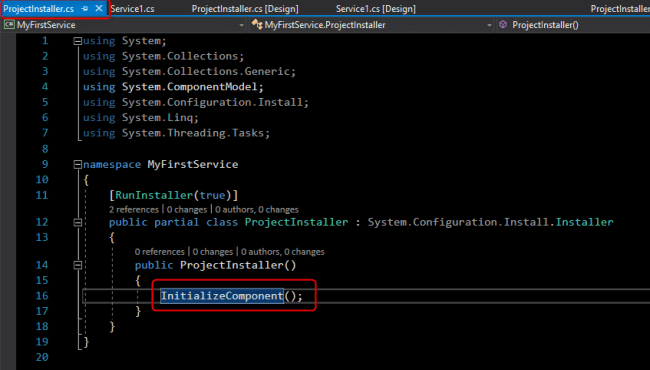
Step 6 Select InitializeComponent method and press F12 key to go definition
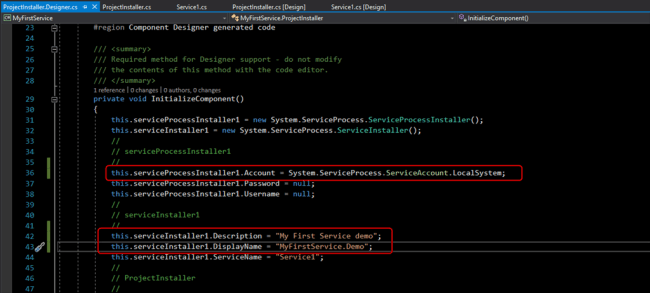
Step 7 Now add the below line:
this.serviceProcessInstaller1.Account = System.ServiceProcess.ServiceAccount.LocalSystem;
You also can add description and display service name (optionally).
- this.serviceInstaller1.Description = "My First Service demo";
- this.serviceInstaller1.DisplayName = "MyFirstService.Demo";
Step 8 In this step, we will implement a timer, and code to call the service at a given time. We will create a text file and write the current time in the text file using the service.
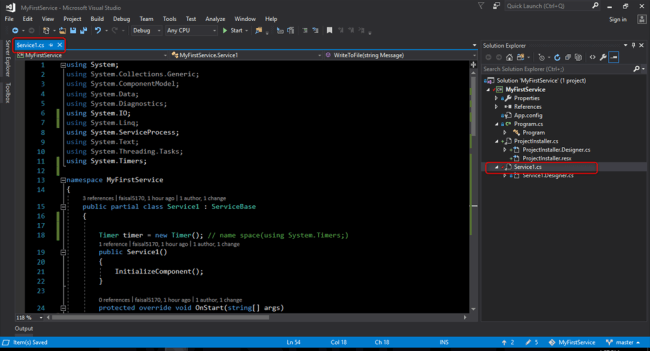
Service1.cs class
- using System;
- using System.Collections.Generic;
- using System.ComponentModel;
- using System.Data;
- using System.Diagnostics;
- using System.IO;
- using System.Linq;
- using System.ServiceProcess;
- using System.Text;
- using System.Threading.Tasks;
- using System.Timers;
- namespace MyFirstService {
- public partial class Service1: ServiceBase {
- Timer timer = new Timer(); // name space(using System.Timers;)
- public Service1() {
- InitializeComponent();
- }
- protected override void OnStart(string[] args) {
- WriteToFile("Service is started at " + DateTime.Now);
- timer.Elapsed += new ElapsedEventHandler(OnElapsedTime);
- timer.Interval = 5000; //number in milisecinds
- timer.Enabled = true;
- }
- protected override void OnStop() {
- WriteToFile("Service is stopped at " + DateTime.Now);
- }
- private void OnElapsedTime(object source, ElapsedEventArgs e) {
- WriteToFile("Service is recall at " + DateTime.Now);
- }
- public void WriteToFile(string Message) {
- string path = AppDomain.CurrentDomain.BaseDirectory + "\\Logs";
- if (!Directory.Exists(path)) {
- Directory.CreateDirectory(path);
- }
- string filepath = AppDomain.CurrentDomain.BaseDirectory + "\\Logs\\ServiceLog_" + DateTime.Now.Date.ToShortDateString().Replace('/', '_') + ".txt";
- if (!File.Exists(filepath)) {
- // Create a file to write to.
- using(StreamWriter sw = File.CreateText(filepath)) {
- sw.WriteLine(Message);
- }
- } else {
- using(StreamWriter sw = File.AppendText(filepath)) {
- sw.WriteLine(Message);
- }
- }
- }
- }
- }
Code explanation - the above code will call service every 5 seconds and create a folder if none exists and write our message.
Step 9. Rebuild your application.
Right-click on your project or solution and select Rebuild. 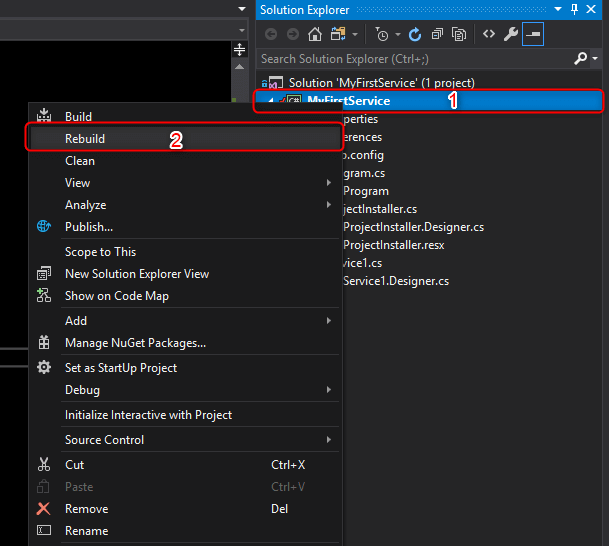
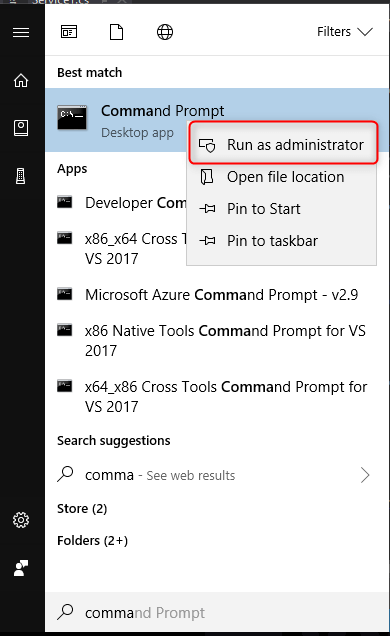
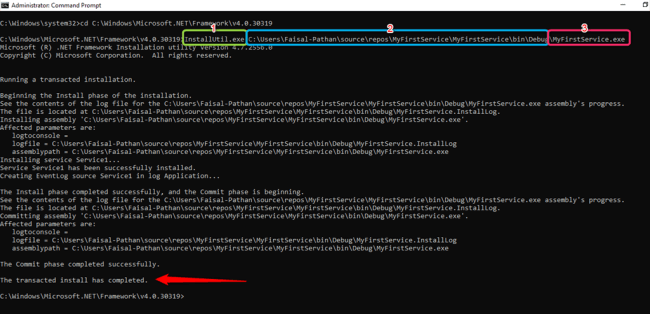
Step 10 Search “Command Prompt” and run as administrator
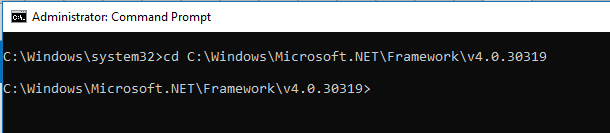
Step 11 Fire the below command in the command prompt and press ENTER.
cd C:\Windows\Microsoft.NET\Framework\v4.0.30319
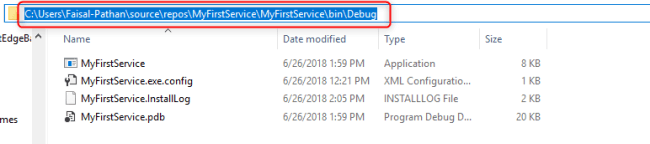
Step 12 Now Go to your project source folder > bin > Debug and copy the full path of your Windows Service exe file.
Installing a Windows Service
Syntax InstallUtil.exe + Your copied path + \your service name + .exe
Our path InstallUtil.exe C:\Users\Faisal-Pathan\source\repos\MyFirstService\MyFirstService\bin\Debug\MyFirstService.exe
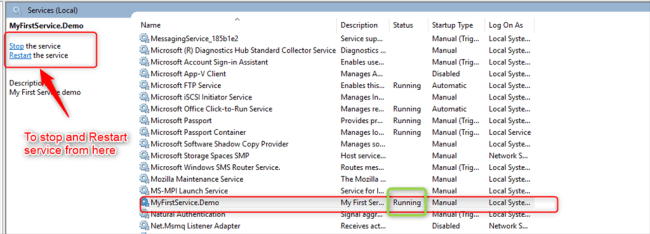
Check the status of a Windows Service
- Press Window key + R.
- Type services.msc
- Find your Service.
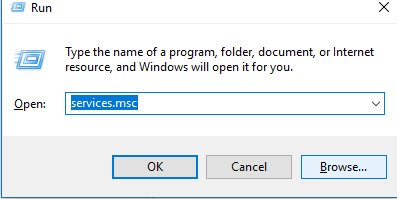

You may notice that the Windows service is running.
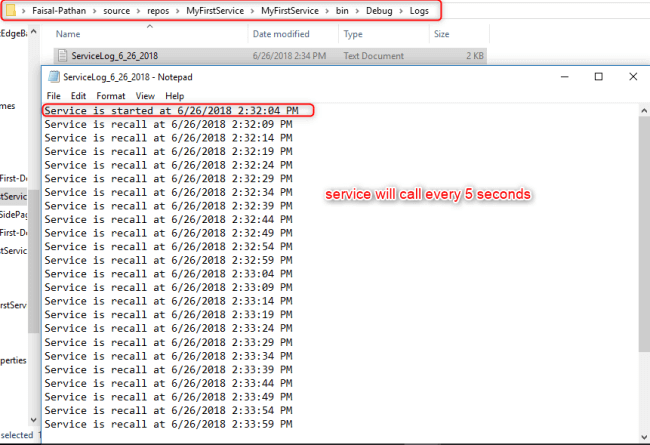
Check Windows Service Output
The service will create a text file with the following text in it.
Uninstalling a Windows Service
- Syntax InstallUtil.exe -u + Your copied path + \your service name + .exe
- Our path InstallUtil.exe -u C:\Users\Faisal-Pathan\source\repos\MyFirstService\MyFirstService\bin\Debug\MyFirstService.exe
No comments:
Post a Comment